Dirt is the foundation of everything we build — literally. Yet it remains one of the most underestimated variables in construction project planning. A miscalculation about soil quality can turn a profitable earthwork job into a money pit: unstable subgrades, compaction failures, drainage problems, and contamination liability can each add tens of thousands of dollars in unexpected costs. According to the American Society of Civil Engineers, poor geotechnical decision-making contributes to billions of dollars in infrastructure damage annually across the United States.
Whether you're a general contractor sourcing fill for a commercial pad, an earthwork subcontractor moving material between sites, or a developer evaluating a raw parcel, understanding how to assess dirt quality is a non-negotiable professional skill. This guide breaks down the science, the standards, the testing protocols, and the practical field judgments that separate an informed soil decision from an expensive gamble.
Why Dirt Quality Matters More Than Most Contractors Realize
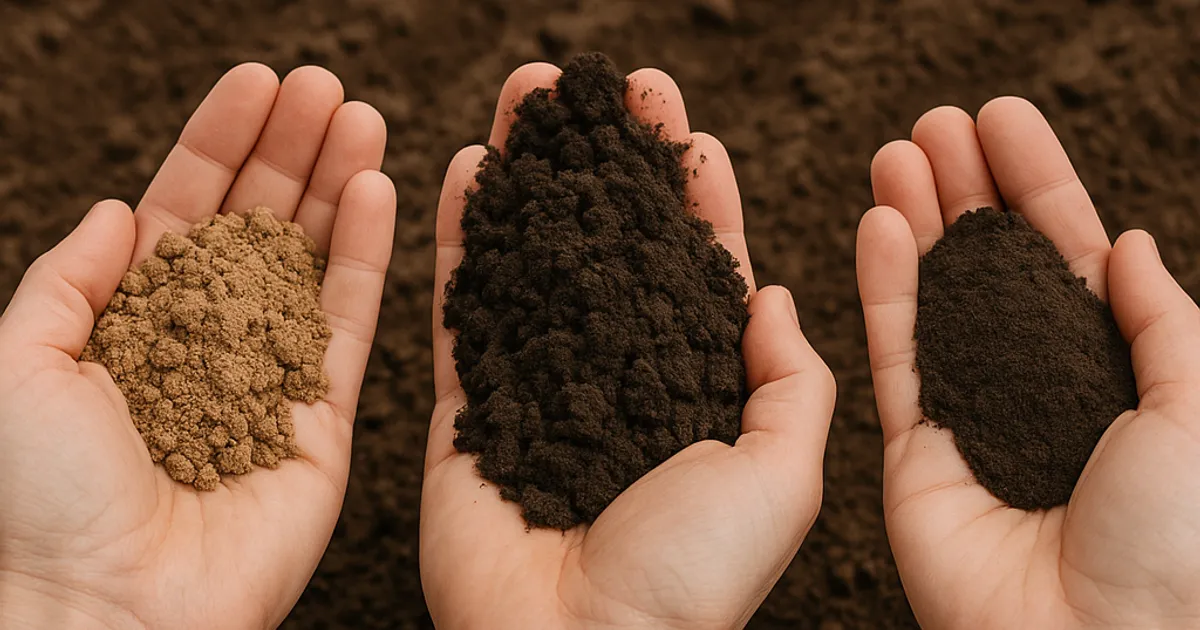
Soil is a complex, heterogeneous material. Even on a single project site, conditions can shift dramatically across a few hundred feet — from dense, well-graded gravel to expansive clay that swells 10% in volume when wet. The consequences of ignoring these variations cascade quickly.
Consider a mid-size residential subdivision in the Denver area where a developer imported cheap fill dirt without testing. The material contained high plasticity clay with a Liquid Limit above 50, making it prone to significant shrink-swell behavior. Within two years, foundations began cracking, retaining walls buckled, and the developer faced over $2.3 million in warranty claims and litigation. The fill had been purchased at roughly $8 per cubic yard — a bargain that ultimately cost more than $40 per yard once remediation was factored in.
This is not an isolated story. The Federal Highway Administration (FHWA) estimates that embankment failures and subgrade problems attributable to poor soil characterization cost the U.S. transportation sector alone over $1 billion per year in repairs and project delays.
Quality soil evaluation protects you from:
- Structural failures caused by inadequate bearing capacity or differential settlement
- Drainage and erosion problems linked to improper permeability and gradation
- Compaction failures that require rework and re-testing on tight project schedules
- Environmental liability from contaminated fill material — a growing regulatory concern in urban infill markets like dirt exchange in San Francisco and dirt exchange in Los Angeles
- Project delays from non-conforming material rejection by geotechnical inspectors
Understanding what you're working with — and what you need — is the first step toward building something that lasts.
The Unified Soil Classification System: Your First Framework
Before any testing begins, every construction professional should be fluent in the Unified Soil Classification System (USCS), codified under ASTM D2487. This system, developed originally by Dr. Arthur Casagrande for the U.S. Army Corps of Engineers, classifies soils into groups based on grain size, plasticity, and gradation — the three primary factors that determine how soil behaves under load, water, and compaction.
USCS Soil Classifications at a Glance
| USCS Symbol | Soil Type | Construction Suitability |
|---|---|---|
| GW | Well-graded gravel | Excellent — ideal subbase and fill |
| GP | Poorly graded gravel | Good — may need blending |
| GM | Silty gravel | Good — moisture-sensitive |
| GC | Clayey gravel | Moderate — watch plasticity |
| SW | Well-graded sand | Excellent — great for structural fill |
| SP | Poorly graded sand | Moderate — low cohesion |
| SM | Silty sand | Moderate — compacts well when dry |
| SC | Clayey sand | Moderate — control moisture carefully |
| ML | Low plasticity silt | Poor — frost-susceptible |
| CL | Low plasticity clay | Poor — moderate shrink-swell |
| CH | High plasticity clay | Very Poor — significant expansion risk |
| MH | High plasticity silt | Very Poor — unstable when wet |
| OL | Organic silt/clay | Unacceptable — no structural use |
| OH | High plasticity organic clay | Unacceptable — no structural use |
| Pt | Peat | Unacceptable — must be removed |
Most state DOTs and municipal specifications reference USCS classifications directly. For example, California DOT (Caltrans) Standard Specifications Section 19 identifies acceptable embankment fill as material classified GW, GP, SW, SP, GM, SM, GC, or SC — with specific restrictions on plasticity index. Texas DOT (TxDOT) Standard Specifications Item 132 similarly restricts high-plasticity materials (CH, MH) from use in embankment construction without lime or cement stabilization.
Knowing where your material falls on this chart before it leaves the borrow site or the offloading truck can save a rejection call from the project geotechnical engineer.
Field Testing Methods: What You Can Evaluate On-Site
Not every soil decision requires a full geotechnical laboratory report. Experienced earthwork professionals use a suite of field tests to make rapid, informed judgments — especially when evaluating incoming fill material or characterizing a cut area before hauling begins.
Visual and Manual Classification (ASTM D2488)
ASTM D2488, the standard for visual-manual description and identification of soils, provides a structured framework for field classification. A trained technician can identify:
- Grain size and gradation by examining particle distribution (gravel, sand, fines)
- Plasticity using the ribbon test — rolling a moist soil sample into a thread 1/8 inch in diameter; clay-rich soils form a long, smooth ribbon while silts crumble quickly
- Dilatancy — shaking a pat of moist soil to observe whether water appears on the surface (characteristic of silts)
- Dry strength — how hard a dried soil pat becomes, indicating clay content
- Odor — a musty, organic smell immediately flags potential organic content or contamination
While ASTM D2488 is explicitly a "practice" (not a standard test method) and does not replace laboratory classification, it gives field crews actionable information within minutes.
Proctor Penetrometer / Pocket Penetrometer
A pocket penetrometer gives a rapid estimate of unconfined compressive strength in cohesive soils, typically reading 0–4.5 tons per square foot (tsf). While not a substitute for lab testing, it helps field crews gauge whether a subgrade is stiff enough to support equipment or whether additional stabilization is needed before fill placement.
Nuclear Density Gauge Testing (ASTM D6938)
Once fill is placed and compacted, nuclear density gauges measure in-place dry density and moisture content quickly — typically in under five minutes per reading. Compaction acceptance in most specs requires achieving at least 90–95% of the maximum dry density established by the Standard Proctor test (ASTM D698) or Modified Proctor test (ASTM D1557), depending on the application.
Clegg Impact Hammer
Increasingly popular on DOT projects, the Clegg Impact Hammer provides a bearing value (CIV — Clegg Impact Value) that correlates to California Bearing Ratio (CBR), a measure of pavement subgrade strength. It's especially useful for rapid quality control on large-area fills where comprehensive nuclear gauge testing would be impractical.
Laboratory Testing: The Complete Analytical Arsenal
When the stakes are high — structural foundations, roadway embankments, retaining walls, or any work subject to geotechnical special inspection — field tests must be backed by laboratory analysis. Here's what a complete soil testing program looks like and what each test tells you.
Grain Size Analysis (ASTM D6913 / ASTM D7928)
Sieve analysis (for coarse-grained soils) and hydrometer analysis (for fine-grained soils) quantify the distribution of particle sizes in a sample. Results are expressed as a gradation curve. Key metrics derived from this test:
- D10, D30, D60 — particle sizes at the 10th, 30th, and 60th percentile
- Coefficient of Uniformity (Cu) — D60/D10; values above 4 for gravels and 6 for sands indicate well-graded material
- Coefficient of Curvature (Cc) — must fall between 1 and 3 for well-graded classification
Well-graded soils compact more effectively, achieve higher density, and provide better structural support than gap-graded or uniformly graded materials.
Atterberg Limits (ASTM D4318)
The Atterberg Limits test determines the Liquid Limit (LL), Plastic Limit (PL), and the calculated Plasticity Index (PI = LL - PL). These values define the moisture range over which a fine-grained soil behaves plastically.
Critical benchmarks:
- PI < 15: Generally acceptable for structural fill with proper moisture control
- PI 15–30: Requires careful moisture management; lime stabilization often specified
- PI > 30: Typically rejected as structural fill; may require full replacement or chemical stabilization
The U.S. Army Corps of Engineers Engineering Manual EM 1110-1-1905 references Atterberg Limits extensively in foundation and embankment design criteria.
Standard and Modified Proctor Compaction Tests (ASTM D698 / ASTM D1557)
The Proctor compaction test defines the maximum dry density (MDD) and optimum moisture content (OMC) for a given soil. These values establish the target that field compaction must achieve:
- Standard Proctor (ASTM D698): 12,400 ft-lb/ft³ compactive energy — used for most embankment and subgrade work
- Modified Proctor (ASTM D1557): 56,000 ft-lb/ft³ — used for pavement subgrades, airport runways, and structural fill beneath foundations
A typical well-graded granular fill might have an MDD of 130–140 pcf at an OMC of 8–12%. High-plasticity clays might show MDD of 90–100 pcf at OMC of 20–25% — much more moisture-sensitive and harder to compact correctly in the field.
California Bearing Ratio (ASTM D1883)
CBR measures the load-bearing capacity of a compacted soil relative to a standard crushed stone. It's the primary input for flexible pavement design (AASHTO method) and highway embankment design:
- CBR < 3: Very poor subgrade — typically requires stabilization or replacement
- CBR 3–7: Poor to fair — lime or geotextile reinforcement often specified
- CBR 7–20: Good — acceptable for most pavement subgrades with proper thickness design
- CBR > 20: Excellent — minimal pavement thickness required
Soil pH and Corrosivity Testing
For projects involving buried infrastructure — pipes, anchors, rebar — soil pH and resistivity testing (ASTM G187) are critical. Highly acidic soils (pH < 5.5) or low-resistivity soils can dramatically accelerate metal corrosion. Chloride and sulfate content testing (ASTM C1218 / ASTM D4327) is also important where concrete will contact fill soils.
Organic Content (ASTM D2974)
Loss-on-ignition testing quantifies the percentage of organic matter in a soil sample. Most specifications reject fill material with organic content above 3–5%. Organic soils decompose over time, leading to long-term settlement that can be unpredictable and difficult to remediate after construction.
Contamination Testing: The Environmental Dimension You Can't Ignore
In urban markets and on brownfield redevelopment sites, contamination assessment is as important as geotechnical testing — and in many cases, legally required before dirt can be moved at all.
Regulatory Framework
The EPA's Resource Conservation and Recovery Act (RCRA) and CERCLA (Superfund) establish federal liability frameworks for contaminated soil management. At the state level, programs like California's DTSC Voluntary Cleanup Program, New York's Brownfield Cleanup Program, and Washington State's Model Toxics Control Act (MTCA) impose soil cleanup standards that vary by end-use designation (residential vs. commercial/industrial).
Critical point: If you haul contaminated soil off a project site without proper characterization and disposal documentation, you can assume joint liability for wherever that material ends up — even if you didn't generate the contamination. This is one of the primary reasons responsible contractors in high-density markets like dirt exchange in Boston and dirt exchange in Seattle insist on documented soil manifests and Phase I/Phase II environmental site assessments before accepting imported fill.
Common Contaminants to Test For
| Contaminant Category | Common Sources | Key Tests |
|---|---|---|
| Petroleum hydrocarbons (TPH) | UST sites, fueling areas | EPA Method 8015 / 8260 |
| Heavy metals (lead, arsenic, chromium) | Industrial sites, older urban fill | EPA Method 6010 / 6020 |
| Polycyclic aromatic hydrocarbons (PAHs) | Asphalt, coal tar, manufactured gas plants | EPA Method 8270 |
| Volatile organic compounds (VOCs) | Dry cleaners, chemical storage | EPA Method 8260 |
| Asbestos-containing material (ACM) | Pre-1980 demolition debris | PLM / TEM analysis |
| PFAS compounds | Firefighting foam, industrial sites | EPA Method 533 / 537.1 |
A Phase I Environmental Site Assessment (ASTM E1527-21) reviews historical records and identifies recognized environmental conditions (RECs). If RECs are found, a Phase II assessment involves actual soil sampling and laboratory analysis — costs typically run $3,000–$15,000 depending on site complexity and number of samples.
Practical Contamination Red Flags
Even without formal testing, field crews should watch for: discolored soil (dark staining, unusual color patterns), petroleum odors, debris mixed into fill (chunks of concrete, metal, construction waste), elevated temperature readings in fill piles, and stressed or absent vegetation patterns on source sites.
Platforms like DirtMatch address this challenge head-on by allowing contractors to specify material requirements and review seller-provided documentation, helping both parties ensure compliance before a single truck is dispatched.
Understanding Fill Specifications: What Projects Actually Require
Knowing how to test soil is only half the equation — you also need to know what specifications your project demands. Fill requirements vary widely by application, and mismatching material to specification is one of the most common and costly mistakes in earthwork contracting.
Structural Fill Beneath Foundations
For structural fill supporting shallow foundations, most geotechnical engineers specify:
- Material classified GW, GP, GM, SW, SP, or SM per USCS
- Maximum fines content (passing No. 200 sieve) of 10–15%
- PI ≤ 15 (often ≤ 10 for high-load applications)
- Compaction to ≥ 95% of Modified Proctor MDD (ASTM D1557)
- Maximum particle size of 3–6 inches (depending on lift thickness)
Roadway Embankment Fill
State DOT specifications typically require:
- Compaction to 90–95% of Standard or Modified Proctor MDD
- PI ≤ 20 for general embankment (many states specify ≤ 15)
- No free water, frozen material, or organic debris
- Lift thickness controlled based on compaction equipment type (typically 6–12 inches loose)
- Moisture within ±2–3% of optimum
Utility Trench Backfill
AWWA M23 and ASTM D2321 govern flexible pipe installation and recommend:
- Granular material (well-graded sand or pea gravel) for pipe bedding and initial backfill zones
- PI ≤ 10 for material within 12 inches of pipe
- Compaction requirements vary by zone: haunch zone typically 85–90% Standard Proctor; upper backfill 90–95%
Landscaping and Non-Structural Fill
Not every application requires engineered fill. Landscaping, site grading for non-structural areas, and general leveling work can often use lower-grade material — but even here, avoiding high organic content and contamination is essential. Topsoil for finished grades typically requires:
- Organic matter content of 2–8% (ASTM D5268 defines topsoil standards)
- pH of 6.0–7.5 for most turf and planting applications
- Free of debris, construction waste, and noxious weed seeds
Find or Post Dirt, Rock & Aggregate
Join thousands of contractors using DirtMatch to buy, sell, and exchange earthwork materials.
Try DirtMatch FreeThe True Cost of Dirt Quality: A Financial Breakdown
Understanding soil quality has direct financial implications at every stage of a project. Here's a realistic cost picture that experienced contractors track.
Testing Costs
| Test | Typical Cost Range |
|---|---|
| Visual classification (field) | $0 — technician time only |
| Sieve analysis (ASTM D6913) | $80–$150 per sample |
| Atterberg Limits (ASTM D4318) | $75–$150 per sample |
| Standard Proctor (ASTM D698) | $150–$250 per sample |
| Modified Proctor (ASTM D1557) | $175–$275 per sample |
| CBR test (ASTM D1883) | $250–$400 per sample |
| Nuclear gauge density test (field) | $15–$30 per reading |
| Organic content (ASTM D2974) | $60–$100 per sample |
| Total petroleum hydrocarbons (TPH) | $100–$200 per sample |
| Metals panel (8 metals) | $150–$300 per sample |
| Phase I ESA | $2,000–$5,000 per site |
| Phase II ESA (basic) | $5,000–$15,000+ |
A comprehensive pre-construction soil testing program for a mid-size commercial project typically runs $3,000–$12,000 — a fraction of the cost of a single compaction failure rework or contamination remediation event.
Remediation and Rework Costs
- Subgrade stabilization with lime: $4–$8 per square yard treated
- Cement-treated base (CTB): $8–$15 per square yard
- Over-excavation and recompaction of failed subgrade: $12–$25+ per cubic yard
- Contaminated soil excavation and disposal: $50–$250+ per ton (depending on contaminant type and disposal facility)
- Foundation repair due to expansive soil settlement: $10,000–$100,000+ per structure
For contractors actively sourcing or disposing of fill material, working with verified counterparties dramatically reduces the risk of expensive material mismatches. DirtMatch connects earthwork contractors with nearby fill dirt sources that have been categorized by material type, helping streamline the vetting process and reduce hauling costs — one of the largest variables in fill dirt economics.
Regional Soil Conditions: How Geography Shapes Your Evaluation Strategy
Soil conditions across the United States vary dramatically by geology, climate, and land-use history. Smart contractors calibrate their evaluation approach to local conditions.
Expansive Clays: The Southwest and Mountain West Challenge
The Front Range of Colorado, the Dallas-Fort Worth Metroplex, and parts of the San Joaquin Valley are infamous for expansive clays — predominantly montmorillonite minerals that can exert uplift pressures exceeding 10,000 psf. For contractors working in dirt exchange in Denver or dirt exchange in Boulder, PI testing of all imported fill is non-negotiable, and most local geotechnical specifications require PI ≤ 15 for structural applications.
Collapsible Soils: The Intermountain West
Loess deposits and alluvial fan materials in Nevada, Arizona, and parts of California can be collapsible — they appear dense and strong when dry but collapse suddenly when wetted under load. Hydrocollapse potential is assessed using ASTM D5333 (one-dimensional collapse potential test). Always wet-test suspect materials before using them as structural fill in arid climates.
Soft Bay Mud and Organic Deposits: Pacific Coast Markets
San Francisco Bay mud — a notorious soft clay with undrained shear strength as low as 200–400 psf — underlies much of the Bay Area. Similar soft organic deposits exist around Puget Sound. In these markets, imported fill must be carefully evaluated not just for its own properties but for how the additional load will affect underlying soft soils. Settlement analyses, consolidation tests (ASTM D2435), and ground improvement strategies (surcharge, wick drains, deep mixing) are common requirements.
Frost-Susceptible Soils: Northeast and Upper Midwest
In Boston and other northern markets, frost heave is a critical failure mechanism. Silty soils (ML, MH) are highly frost-susceptible because their pore sizes promote ice lens formation by capillary action. The U.S. Army Cold Regions Research and Engineering Laboratory (CRREL) classifies frost susceptibility from F1 (low) to F4 (very high). Structural fill in frost-affected areas should be non-frost-susceptible (NFS) material — typically less than 3% fines passing the No. 200 sieve for gravels, less than 5% for sands — per many state DOT specifications.
Step-by-Step Soil Evaluation Protocol for Incoming Fill Material
Here's a practical, field-tested process for evaluating fill dirt before it's placed on your project — whether it's coming from an excavation next door or a borrow source across town.
Step 1: Review Documentation Before Delivery
Request from the material source:
- Soil classification report (lab-based USCS classification per ASTM D2487)
- Proctor compaction test results (ASTM D698 or D1557)
- Atterberg Limits if fine-grained material is suspected
- Environmental clearance or manifest (especially for urban fill sources)
- Any geotechnical boring logs from the source site
If documentation isn't available — or if the source is a demolition/excavation site with unknown history — budget for independent sampling before acceptance.
Step 2: Perform Visual Inspection at the Source or Upon Delivery
Before the truck unloads, walk the load:
- Check for obvious debris: concrete chunks, rebar, wood, plastic, asphalt
- Note color uniformity — unusual dark staining warrants scrutiny
- Smell the material — petroleum odors are an immediate stop-work trigger
- Estimate grain size distribution visually
- Check moisture condition — is material workable, or is it a slurry?
Step 3: Collect Representative Samples
For incoming fill, collect samples using a random stratified sampling plan — at minimum, one sample per 500 cubic yards for small projects, or per the project's geotechnical report requirements. Samples should be collected from multiple locations within the delivery load, not just the top surface.
Step 4: Perform Field Classification
Using ASTM D2488, classify the material in the field. Record:
- Estimated USCS symbol
- Plasticity (ribbon test result)
- Estimated fines content
- Any anomalies noted
Step 5: Submit for Laboratory Testing
Based on the field classification result, submit samples for the appropriate lab tests. A typical QA/QC testing package for structural fill includes:
- Grain size analysis + Atterberg Limits (for USCS verification)
- Proctor compaction test (to establish field compaction targets)
- Organic content test (if any organic indicators were noted)
Step 6: Compare Results to Project Specifications
Check every lab result against the project geotechnical report or specification. Flag any parameter that falls outside the accepted range and notify the project engineer before placing material.
Step 7: Monitor In-Place Compaction
Once material is approved and placed, establish a density testing frequency per the specification — typically one nuclear gauge test per 500–2,500 square feet per lift, or as directed by the geotechnical engineer of record. Maintain records for all passing tests and document corrective actions for any failing tests.
How Technology Is Transforming Dirt Quality Management
The earthwork industry is undergoing a quiet digital revolution, and soil quality management is at the center of it. From GPS-enabled compaction monitoring to AI-assisted soil classification apps, technology is reducing the guesswork in fill evaluation.
Machine Guidance and Intelligent Compaction
Intelligent compaction systems — now specified on many state DOT projects — use accelerometers mounted on compaction equipment rollers to continuously measure soil stiffness in real time, creating a full-coverage map of compaction performance rather than spot-checking with a nuclear gauge. The FHWA has published guidance (FHWA-HRT-12-052) promoting intelligent compaction as a quality improvement tool, and several states including Minnesota, Texas, and Virginia have fully integrated it into standard specifications.
Digital Soil Testing Platforms
Laboratory information management systems (LIMS) now allow real-time electronic reporting of test results, allowing project teams to receive Proctor and gradation results the same day via digital dashboards rather than waiting for paper reports. This speed matters enormously when a large fill placement operation is waiting on a lab call to proceed.
Online Fill Material Marketplaces
Perhaps the most significant innovation for the earthwork contracting community is the emergence of digital platforms that match surplus excavation material with construction sites that need fill — eliminating truck deadheads, reducing landfill diversion costs, and shortening the distance between material source and destination. When you get started with DirtMatch, you gain access to a network of verified material sources and project opportunities, with material specifications posted by sellers so you can evaluate quality fit before committing to haul. This kind of transparency was simply not available to most contractors just a decade ago, and it's fundamentally changing how earthwork professionals source compliant fill material.
Common Mistakes in Soil Evaluation — And How to Avoid Them
Even experienced earthwork professionals fall into predictable traps when evaluating soil quality. Here are the most consequential mistakes and concrete strategies to avoid them.
Mistake 1: Relying on Visual Inspection Alone
Visual inspection is a starting point, not a conclusion. Silts and fine sands can look similar to experienced eyes but behave completely differently under load and in wet conditions. Always back up field classification with lab testing for any structural application.
Mistake 2: Testing Only One Sample from a Large Stockpile
A stockpile of mixed fill materials — especially those aggregated from multiple excavation sources — can be highly variable. A single test at the surface tells you almost nothing about material three feet deep or at the opposite end of the pile. Use stratified random sampling and collect a minimum of one sample per 300–500 cubic yards for heterogeneous stockpiles.
Mistake 3: Ignoring Moisture Sensitivity During Wet Season Operations
A material that passes all specifications at optimum moisture can become unworkable in wet conditions. For projects scheduled through rainy seasons in markets like the Pacific Northwest or New England, evaluate not just the MDD/OMC curve but also the moisture sensitivity of the material — how quickly it degrades when worked wet. Materials with PI > 12 are generally prone to pumping and shear failure if worked at moisture contents above optimum.
Mistake 4: Accepting Contaminated Urban Fill Without Documentation
The pressure to find cheap, local fill on urban projects is real — but cutting corners on environmental documentation can expose your company to CERCLA liability that dwarfs any short-term savings. Always request and retain written documentation of the fill source, including a site history, and require TPH and metals testing on any fill from former industrial or commercial land.
Mistake 5: Overlooking the Specification
Some contractors test soil in a vacuum — without checking what the actual project specification requires. A PI of 18 might be perfectly acceptable for general embankment fill but completely unacceptable for subgrade directly beneath a pavement section. Always start with the specification and work backward to determine what tests are needed and what results are required.
Mistake 6: Not Tracking and Reporting Failing Tests Properly
On projects subject to geotechnical special inspection, failing density or classification tests must be documented, reported, and formally accepted (with corrective action) before paving or foundation work can proceed. Ignoring failing tests — or simply running more tests until you get a passing result without addressing the underlying problem — is both unethical and a serious professional liability.
Building a Soil Quality Management Plan for Your Earthwork Business
The most competitive earthwork contractors don't just react to soil quality problems — they build systematic quality management plans that prevent them. Here's a framework for operationalizing soil evaluation in your business.
Establish Standard Operating Procedures
Document your company's standard approach to soil evaluation for each common project type: structural fill, roadway embankment, utility backfill, landscaping. Specify which tests are required at what frequency, who is authorized to approve material, and what the escalation path is when results are non-conforming.
Build Relationships with Accredited Labs
Establish standing accounts with one or two AASHTO accredited geotechnical testing laboratories in your market area. Discuss turnaround time expectations, electronic reporting capabilities, and pricing for high-volume testing programs. Faster results mean less hold time on material decisions.
Train Your Field Crews in Basic Soil Recognition
Invest in one-day field classification training for your equipment operators and foremen. A trained operator who can recognize problematic material before it's dumped saves far more than the training cost. Many state DOT contractors require operators to hold basic geotechnical awareness certification.
Use Digital Tools to Track Fill Sources and Quality Records
Maintain a digital log of every fill source used on each project, including material classification, test results, environmental documentation, and volume received. This documentation is your legal protection if a quality dispute arises months or years later.
For contractors looking to scale their earthwork operations while maintaining material quality standards, DirtMatch Pro offers advanced tools for managing multiple projects, tracking material specifications, and connecting with a curated network of vetted fill sources — all in one platform built specifically for the earthwork industry.
Conclusion: The Competitive Advantage of Knowing Your Dirt
In an industry where margins are measured in cents per cubic yard, the ability to accurately and efficiently evaluate dirt quality is one of the highest-ROI skills a contractor can develop. It protects your projects from failure, your company from liability, and your reputation from the kind of damage that follows a high-profile earthwork failure.
The fundamentals haven't changed: grain size, plasticity, compaction characteristics, and contamination status define whether a material is an asset or a liability on your project. But the tools for evaluating, sourcing, and documenting fill material have never been more powerful — or more accessible.
Whether you're a solo operator moving a few hundred yards of fill or a regional contractor managing a multi-site earthwork program, building soil quality evaluation into your standard workflow is one of the smartest investments you can make. Start with the basics — learn to read a Proctor curve, understand what a plasticity index means, and know when to call a geotechnical engineer. Layer in digital tools and verified material networks to work smarter. And always, always document what you put in the ground.
The ground doesn't lie — but it rewards the professionals who bother to ask it the right questions.